
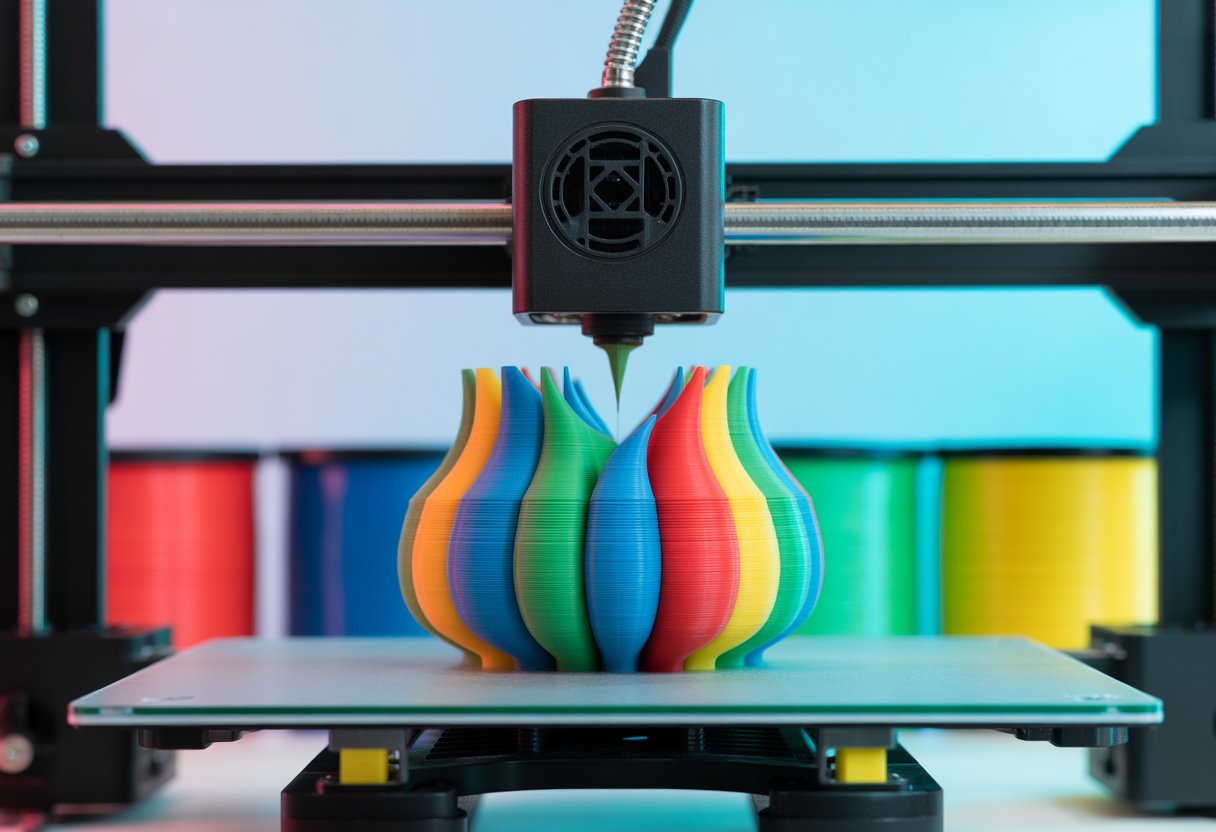
3D printing in multiple colors lets you make more interesting and colorful prints instead of plain single-color objects. You can add different colors to show details, create logos, or just make your prints look better. There are several ways to print in multiple colors, from simple methods like pausing your printer to swap filament by hand, to advanced options like using printers with multiple extruders that change colors automatically.
The good news is that multi-color printing is easier than ever before. You don't need to spend thousands of dollars on fancy equipment to get started. Basic techniques work great for beginners, while more experienced users can explore automated systems that handle color changes for you.
Want to learn which method works best for your needs and budget? Read on to discover all the different ways you can bring colorful 3D prints to life.
Key Takeaways
- You can print multiple colors using simple manual filament swaps or advanced multi-extruder systems
- Different printing methods work better depending on your printer type and project needs
- Proper settings and troubleshooting help you avoid common problems like color bleeding and failed prints
Looking for filament that works perfectly with automated systems? Check out our Bambu filament alternative collection for premium options compatible with AMS-equipped printers.
Fundamentals of Multi-Color 3D Printing

Multi-color 3D printing lets you create objects with different colors in a single print job. You can achieve colorful prints through several methods, each with its own strengths and drawbacks.
How Multi-Color 3D Printing Works
Multi-color 3D printing works by switching between different colored filaments during the printing process. Your printer either pauses so you can manually swap filaments, or it uses multiple nozzles to automatically switch colors.
The simplest method involves pausing your print at specific layers. When the pause happens, you remove the current filament and load a new color. Then you resume printing with the new filament.
More advanced printers use dual extruders or tool changers. These systems hold multiple filaments at once and switch between them automatically. Some printers can handle two colors, while others work with four or more.
Common Multi-Color Methods:
- Manual filament swapping during pauses
- Dual extruder systems with two nozzles
- Multi-material units that feed different filaments to one nozzle
- Tool changers that swap entire print heads
Benefits and Challenges of Printing in Multiple Colors
Multi-color printing makes your objects look more detailed and realistic. You can create logos, text, and designs that stand out. Your prints become more eye-catching and professional-looking without extra painting steps.
The main challenge is filament waste. When your printer switches colors, it must purge the old filament from the nozzle. This purged material gets thrown away. Some prints waste almost as much filament as they use.
Print time increases with multiple colors. Each color change adds time for purging and switching. A print that takes two hours in one color might take four hours with three colors.
Key Challenges:
- High filament waste during color changes
- Longer print times
- More complex setup and calibration
- Higher equipment costs for automatic systems
Difference Between Multi-Color and Multi-Material Printing
Multi-color printing uses the same type of filament in different colors. You might use PLA in red, blue, and yellow for one print. The material properties stay the same across your whole object.
Multi-material printing combines different types of plastic in one print. You could mix PLA with TPU (flexible filament) or use support material that dissolves in water. This approach changes the physical properties of different parts.
Your printer needs special features for true multi-material printing. The nozzle temperature must adjust for different materials. Some material combinations don't stick together well, which can cause print failures.
Most beginners start with multi-color printing because it's simpler. You use one material type and only change the color. Multi-material printing requires more experience and careful planning to get good results.
Wondering which materials work best together in multi-color prints? Understanding filament compatibility prevents failed prints and wasted time. Learn more by reading our guide 3D Filament Types: Complete Guide for Every 3D Project.
Single-Extruder Methods for Printing in Multiple Colors

You can create multicolor 3D prints with just one extruder by swapping filaments during the print or using special slicer settings to pause at the right time. These methods work with common filament types like PLA, PETG, and TPU.
Manual Filament Swapping and Color Change Techniques
Manual filament swapping means you pause your printer during a print and change the filament color by hand. You stop the print at a specific layer, remove the old filament, and load a new color. This works best when you want different colors on different layers.
Most 3D printers have a pause function built into their control screen. You press pause, wait for the nozzle to stop, then carefully remove the current filament. After loading the new color, you purge a bit of filament to clear out the old color from the nozzle.
This method takes patience and good timing. You need to watch your print to know when to pause it. The color change happens cleanly when you switch at the start of a new layer instead of mid-layer.
You can do multiple color changes in one print. Just repeat the process each time you want a new color. Write down which layer numbers need color changes before you start printing.
Using Slicer Features for Color Swaps
Popular slicing programs like PrusaSlicer and Cura have built-in features that make color swapping easier. These tools let you set automatic pauses at specific heights or layers. The printer stops on its own, so you don't have to watch the whole print.
In Cura, you use the "Pause at Height" extension. You tell it which layer to pause at, and the printer stops there automatically. PrusaSlicer has a similar feature called "Color Change" that you add using the layer slider.
Common Slicer Settings for Color Swaps:
- Pause Height: Set the exact Z height or layer number
- Retraction: Pull filament back before pausing
- Park Position: Where the nozzle moves during the pause
- Purge Amount: How much filament to push out after color change
These automatic pauses save you from watching your printer constantly. You just need to check on it when the pause happens.
Filament Swapping Best Practices
Always purge extra filament after each color change. Push out at least 50-100mm of the new filament to clear the old color from inside the nozzle. If you don't purge enough, the colors will mix and look muddy.
Keep your nozzle temperature consistent when swapping between similar materials. PLA to PLA swaps are easiest because the temperature stays the same. Switching between different materials like PLA and PETG requires temperature changes and more careful purging.
Clean any oozing filament from the nozzle before resuming your print. Use tweezers or a brass brush while the nozzle is hot. Leftover plastic can stick to your print and ruin the surface.
Plan your color changes at natural breaks in your model. Layer changes work better than mid-layer swaps. Your print will look cleaner if color transitions happen at flat horizontal surfaces.
Want durable parts that survive the color-changing process? Explore our heat resistant filament collection for materials that maintain their strength through multiple thermal cycles.
Multi-Extruder and Automated Multi-Color Solutions

Multi-extruder printers use two or more nozzles to print different colors without stopping. Automated systems can switch filaments for you during a print, making it easier to create colorful designs.
Dual Extrusion and Dual Nozzle Setups
Dual extrusion means your printer has two separate nozzles that can work at the same time. Each nozzle loads a different color of filament. When your print needs to switch colors, the printer simply uses the other nozzle.
This setup lets you create objects with two colors in one print job. You don't need to pause the printer or swap filament by hand. The two nozzles can print support material in one color and your actual model in another color.
Some dual nozzle systems keep both nozzles close together on the same moving part. Others space them farther apart. The closer they are, the less likely you'll see problems with alignment between colors.
One downside is that the inactive nozzle can leak or drag across your print. This sometimes leaves marks or blobs on your finished object. You'll need to adjust your printer settings to reduce these issues.
Automatic Material Switching Systems (AMS/MMU)
An AMS (Automatic Material System) or MMU (Multi-Material Unit) lets you print with many colors using just one nozzle. These devices hold multiple spools of filament and feed them to your printer as needed.
The Prusa MMU3 is a popular choice that works with Prusa printers. It can handle up to five different filaments in a single print. When your print needs a new color, the system pulls out the old filament and loads the new one.
These systems create waste because they purge leftover filament each time they switch colors. You'll see a purge tower or waste block printed alongside your model. This uses extra filament and adds time to your print.
The benefit is that you get access to many colors without buying an expensive printer with multiple nozzles. You just need the add-on unit and your existing printer.
Independent Dual Extruders and Mirror Mode
IDEX (Independent Dual Extruder) printers have two print heads that move separately from each other. Each head works on its own, which means they won't bump into each other or interfere with your print.
These printers give you the cleanest multi-color prints because the unused nozzle parks completely away from your work. You won't deal with oozing or dragging problems like standard dual nozzle setups.
Mirror mode is a special feature on IDEX printers. It lets you print two copies of the same object at once by having both extruders work as mirror images. You can also print two completely different objects at the same time.
IDEX printers cost more than other options, but they offer the most flexibility for multi-color work.
Curious if your printer can handle different filament types in one print? Not all materials play nicely together, and knowing the limits saves frustration. Discover the details in our article Do All 3D Printers Use the Same Filament?.
Alternative Approaches to Achieving Multiple Colors
You can add color to your 3D prints without buying expensive multi-extruder printers or complex systems. Breaking your design into separate colored pieces, using special filaments that change colors on their own, or planning strategic color changes in your design all work well for multicolor 3D printing.
Printing Separately Colored Parts for Assembly
You can print each part of your model in a different color and snap them together when done. This method works great for toys, figurines, and models with distinct colored sections.
Start by splitting your 3D model into separate files using design software. Each file should contain only the parts you want in one color. Print each piece separately using different colored PLA filament.
This approach gives you the cleanest color separation with no blending or mixing between colors. The parts fit together like puzzle pieces when you design them with small connecting tabs or slots.
You'll need to add supports or connection points in your design. Think about how LEGO bricks connect or how action figures have ball joints. These connection methods keep your parts secure after assembly.
The downside is that assembly takes extra time and effort. You might need glue for smaller or more delicate parts. But this method lets you use any single-extruder printer without modifications.
Using Multi-Color and Rainbow Filaments
Rainbow filament gives you automatic color changes without any special printer setup. The filament itself has different colors along its length that transition as your print builds up.
These filaments work in any standard 3D printer. PLA rainbow filament is the most common type and prints just like regular single-color PLA. The colors blend gradually from one to another as the printer feeds more filament.
Color transitions happen based on how much filament your print uses. Tall prints show more color changes than short wide prints. You can't control exactly where the colors change, which makes each print unique.
Multi-color filaments come in different patterns. Some have sharp color switches every few meters. Others blend smoothly through the rainbow. Pick the pattern that fits your project best.
This works better for decorative prints where random color patterns look good rather than models needing exact color placement.
Designing for Color Transitions
You can plan your 3D model to make manual filament swaps easier and more effective. Design your model with clear horizontal layers where colors should change.
Add flat surfaces at the heights where you want to pause and swap filament. This makes the color change cleaner since the new color starts on a complete layer. Avoid designing color changes in the middle of curved or angled surfaces.
Think about your layer height when planning transitions. A 0.2mm layer height means you can place color changes every 0.2mm of height. Plan your model dimensions around these measurements.
Use your slicer software to preview where each color will go. Most slicers let you see individual layers and add pause commands at specific heights.
Design features that hide the connection point between colors. Small ridges, texture changes, or natural dividing lines in your model make color swaps less noticeable if they're not perfectly clean.
Need variety for your multi-color projects? Different colors, same reliable quality across your entire print. Visit our PLA filament for 3D printing collection to stock up on beginner-friendly options in multiple shades.
Optimizing Settings and Workflow for Better Multi-Color Prints
Getting your printer settings right and planning your workflow makes a big difference in how your multi-color prints turn out. The right file setup, slicer settings, and material choices help you avoid common problems and get cleaner color transitions.
Preparing 3D Models and STL Files for Multiple Colors
You need to set up your 3D model files correctly before you start printing. Split your model into separate STL files for each color you want to use. Each part should be its own file that you can assign a different color to in your slicer software.
Make sure all the parts of your model line up perfectly. They should fit together without gaps or overlaps. You can do this by keeping all parts in the same position when you export them as STL files.
Label your files clearly so you know which color goes where. Use names like "vase_blue.stl" and "vase_red.stl" instead of confusing names. This saves time and prevents mistakes when you load files into your slicer.
Some newer printers let you use 3MF files instead of STL files. These files can store color information directly in one file.
Slicer Software Tips: Cura and PrusaSlicer
Both Cura and PrusaSlicer have tools built in for multi-color printing. In Cura, you load your model files and assign each one to a different extruder. Go to the extruder settings and pick which extruder prints which part.
PrusaSlicer works similarly but also has a paint tool. You can paint colors directly onto your model in the software. This works great for simple color changes and is easier than splitting files.
Set your purge tower or wipe tower settings correctly. The purge tower cleans out the old filament before the new color prints. Make it bigger if you see the old color mixing into the new color. A purge volume of 100-150 cubic millimeters usually works well.
Adjust your retraction settings to reduce stringing between colors. Set retraction distance to 5-7mm for most printers. This pulls the filament back so it doesn't ooze while the printer moves.
Material Selection for Multi-Color Printing
PLA is the best choice when you're starting out with multi-color prints. It prints at lower temperatures and doesn't warp easily. Different color PLAs from the same brand usually work well together.
PETG is stronger than PLA but needs more careful temperature control. Make sure all your PETG colors are from the same brand because different brands can have different printing temperatures.
Avoid mixing different material types in one print. Don't combine PLA with PETG or TPU unless your printer is designed for it. They need different temperatures and don't stick together well.
Buy all your filament from the same manufacturer when possible. This keeps the printing temperature consistent across colors.
Need to master filament changes on your specific printer? Each machine has its quirks when swapping colors mid-print. Get expert guidance by reading our walkthrough How to Change Filament Ender 3: Easy Step-by-Step Guide.
Common Issues and Troubleshooting in Multi-Color 3D Printing
Multi-color printing can create amazing results, but it also brings some tricky problems. The most common issues include colors mixing where they shouldn't, wasting too much filament during color changes, and dealing with messy blobs on your prints.
Color Bleeding and Unwanted Color Transitions
Color bleeding happens when leftover filament from your previous color shows up in your new color. This creates muddy or wrong colors in your print. The problem gets worse when you switch from a dark color to a light color.
Your printer needs time to push out the old color completely. If you're using a system like an AMS or MMU, you need to set up your color transitions correctly. Increase the purge amount when switching colors that are very different from each other.
- Add more purge volume in your slicer settings
- Use a purge block or purge tower to waste the mixed filament
- Clean your nozzle between color changes
- Print a small test object first to check your settings
Temperature also matters. If your nozzle is too hot, colors can mix together more easily. Try lowering your temperature by 5-10 degrees when printing multiple colors.
Minimizing Filament Waste and Purge Block Optimization
Multi-color printing wastes a lot of filament. Every time you do a filament swap, material gets thrown away in the purge block. This waste adds up fast and costs you money.
Your purge block is where extra filament goes during color changes. The size of this block depends on how different your colors are. A change from white to black needs more purging than a change from light blue to dark blue.
- Lower your purge volume for similar colors
- Use smart purge settings that adjust based on color combinations
- Place the purge block in a corner of your build plate
- Reuse purge tower waste for non-critical prints
Some slicers let you set different purge amounts for each color pair. This means you can use less filament when switching between similar colors.
Dealing With Nozzle Oozing and Print Artifacts
Nozzle oozing creates blobs and strings on your multi-color prints. When your printer switches colors, hot filament drips from the nozzle. This leaves marks on your print or creates bumps where they don't belong.
Retraction settings control how much filament pulls back into the nozzle. If your retraction is too low, you'll get more oozing. If it's too high, you might get clogs. Start with a retraction distance of 4-6mm for direct drive or 6-8mm for Bowden setups.
- Increase retraction distance by 1mm at a time
- Lower your printing temperature
- Increase retraction speed
- Enable "wipe" settings in your slicer
Print speed also affects oozing. Slower travel moves give filament more time to drip. Speed up your travel moves to 150-200mm/s if your printer can handle it. You should also enable Z-hop so the nozzle lifts up when moving between colors.
Planning to turn your multi-color skills into profit? Colorful custom prints sell better than single-color objects. Learn strategies by diving into our guide How to Make Money With a 3D Printer: 7 Ideas.
Wrap Up
Multi-color 3D printing opens up creative possibilities for makers at every skill level. Start with simple manual filament swaps to learn the basics, then explore automated systems as your skills grow. Remember to adjust your slicer settings, purge properly between colors, and choose quality filament for the best results.
Whether you're creating colorful prototypes, detailed models, or functional parts, the right technique and materials make all the difference. Ready to bring your colorful designs to life? Siraya Tech offers premium filaments engineered for consistent extrusion and reliable performance across all your multi-color printing projects.
Explore our 1.75mm filament collection for the standard size that works with most modern printers, or check out our 3D printer filament range to find the perfect material for your next colorful creation.
Frequently Asked Questions
What's the trick for swapping filament colors during a 3D print job?
The basic trick is to pause your print at the right time and swap out the filament spool. You pull out the old color and feed in the new one, then let the printer keep going.
Most printers let you pause them through the control screen. You can also add a pause command in your slicing software at a specific layer. When the printer stops, you have time to change the filament without messing up your print.
Can you use dual extruders for printing each color separately, or is there another way?
Dual extruder printers have two nozzles that can each hold a different color. The printer switches between them automatically as it builds your model. This saves you from having to pause and change filament yourself.
You can also use a single extruder and change filament manually. Another option is a tool changer system that swaps entire print heads. Some printers even use one nozzle with special systems that switch between multiple filament spools.
How do you keep colors from bleeding into each other when 3D printing?
Colors can mix when leftover filament from the first color comes out with the new color. To fix this, you need to purge the old filament before the new color starts printing.
Most multi-color systems use a purge block or purge tower. This is a separate piece that prints off to the side where the printer pushes out the old color. The nozzle needs to be completely clean before it touches your actual model again.
You can also wipe the nozzle on a special area to remove any mixed filament. The key is giving the new color enough time to fully replace the old one in the hot end.
Is there a way to pause my 3D printer at a specific layer to change filament colors?
Yes, you can add a pause command at any layer you want using your slicing software. Programs like Cura and PrusaSlicer let you insert a pause at a specific layer height or number.
When the printer reaches that layer, it stops and waits for you. You then swap the filament and tell the printer to continue. This gives you exact control over where each color starts and ends.
Some printers also have a pause button you can press manually, but using the software is more accurate.
Are there specific 3D printers that make multi-color printing easier, or can any do the job?
Any 3D printer can do basic color changes if you pause and swap filament manually. But some printers make it way easier with built-in features.
Dual extruder printers and printers with automatic filament switching systems handle color changes for you. Tool changer printers can swap between multiple print heads. These printers cost more but save you time and make complex color prints possible.
Budget printers work fine if you're okay with pausing and changing filament yourself. You just won't get as many colors in one print without a lot of manual work.
What software settings should you tweak to get crisp color transitions in your prints?
Your slicing software needs to know when to switch colors and how much filament to purge. Set up color changes at specific layers where you want the transition to happen.
The purge amount is important because too little leaves the old color mixed in, but too much wastes filament. Start with 100-150mm of purge and adjust based on results.
Retraction settings control how the filament pulls back between color changes. Good retraction helps prevent oozing and color mixing. You might need to slow down your print speed during transitions to keep everything clean.